
Caricamento carrello…
 Loading...
Loading...
Loading...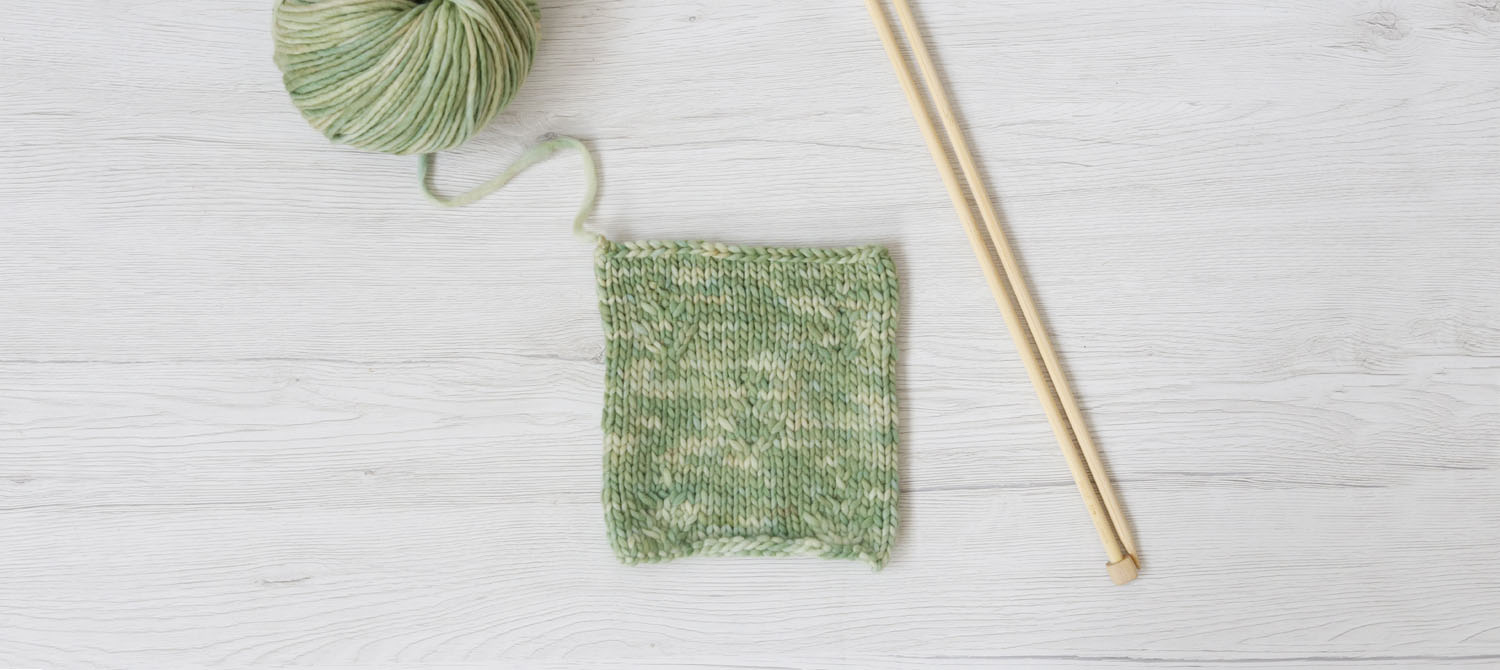
We are fans of the knitted bonsai stitch because it has a very mild texture. In fact, as the title suggests, there are little patterns that resemble stylised, miniature trees, just like little bonsais.
Did you know that the art of bonsai was born in China probably as early on as 500 BC and that its name more or less means “small tree in a pot”?
The yarn that has been chosen for the knitted bonsai stitch is Piuma in the color, Jungle. On the store, however, you can find many other shades to choose from.
MATERIALS
Piuma yarn col. Jungle 100 g / 3.5 oz
Knitting needle n° 8 EU / 11 US
LEVEL OF DIFFICULTY
Intermediate
METHOD
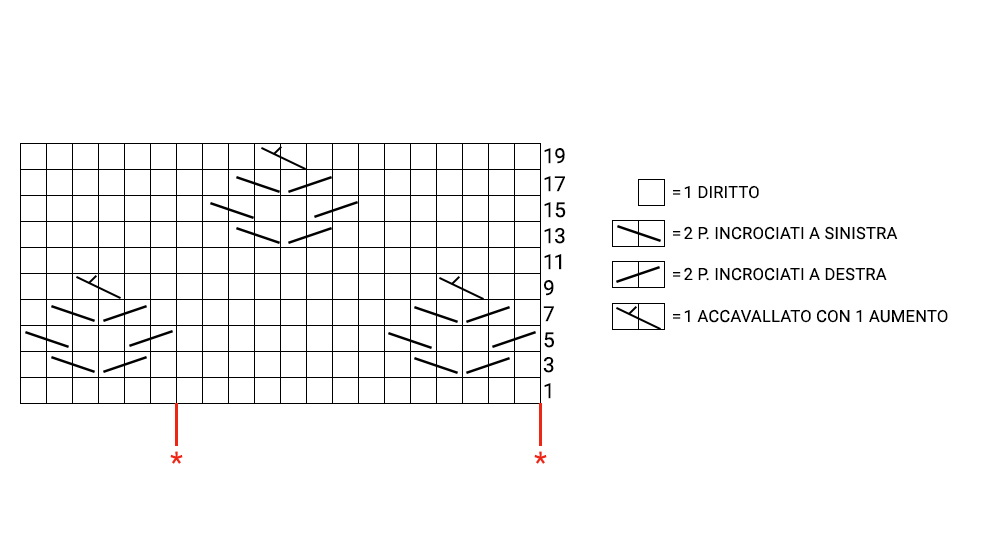
We work off several of foundation stitches in multiples of 14 + 6.
Stockinette stitches on the sides of the pattern are not represented on the diagram and are not indicated in the explanation.
Row 1: knit all stitches
row 2 and all even rows: purl all stitches
row 3 and 7: *knit 1, 2 cross stitches on the right, 2 cross stitches on the left, knit 9*, always repeat from * to * and finish with knit 1, 2 cross stitches on the right, 2 cross stitches on the left, knit 1.
To execute 2 cross stitches on the right: keep 1 open stitch behind, knit 1 and then knit the open stitch.
To execute 2 cross stitches on the left: keep 1 open stitch on the front, purl 1 and then knit the open stitch.
Row 5: *knit 2 cross stitches on the right, knit 2, 2 cross stitches on the left, knit 8*, finish with 2 cross stitches on the right, knit 2, 2 cross stitches on the left
row 9: *knit 2, 1 stitch passed over with 1 increase, knit 10*, always repeat from * to * and finish with knit 2, 1 stitch passed over with and infinite increase, knit 2.
To execute 1 stitch passed over with an increase: pass 1 stitch on the right needle without knitting it, taking it right and with the yarn behind, knit 1 and, without letting the stitch fall off the left needle, cross the past stitch; then knit 1 cross into the yarn left over on the left needle.
Row 11: knit all stitches
row 13 and 17: *knit 8, 2 cross stitches on the right, 2 cross stitches on the left, knit 2*, always repeat from * to * and finish with knit 6
row 15: *knit 7, 2 cross stitches on the right, knit 2, 2 cross stitches on the left, knit 1*, always repeat from * to * and finish with knit 6
row 19: *knit 9, 1 stitch passed over with 1 increase, knit 3*, always repeat from * to * and finish with knit 6
row 21: repeat from row 1.
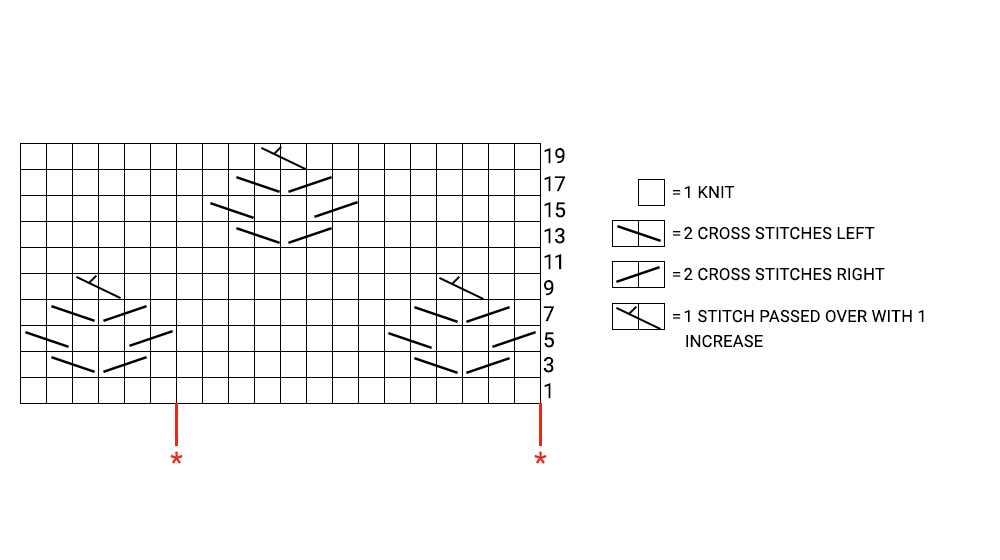
Repeat from * to * for the entire row and finish with the stitches that follow the second *. In the even rows, not represented in the diagram, purl all stitches.
If you liked learning the knitted bonsai stitch and want to learn yet another stitch, then we suggest you read the tutorial on how to knit the Dutch braid stitch.
Today we are sharing a project that everyone can make. Even a beginner will manage [...]

Who could resist a maxi bag made with a strong, multicolored jute yarn. It is [...]

Even those who do not like layering or wearing sparkly garments will change their mind [...]